Setup a Linux Plex Media Server

In this post, I go through all the steps to getting your very own Plex Merdia Server up and running. This is perfect for anyone who wants to have a media server that can be accessed by anyone within a household. You can also set it up to be accessed outside your local network.
Tim Mossholder©
- What Is Plex?
- Setting up the Serveri Plex Server
- Storing Media
- Connecting Clients to The Plex Media Server
- Fixing File Permission Errors with Plex
- Updating Plex Media Server
If you have a vast personal library of TV shows and movies you want to watch or share access to on mobile devices or your TV, Plex is a must-have tool. Here’s what you need to know.
What Is Plex?
Plex Media Server (PMS) is the back-end media server component of Plex, free of charge. It organizes audio and visual content from personal media libraries and streams it to their player counterparts, either on the same machine, the same local area network, or over the Internet.
Plex is a client-server setup where the client directly streams data from the Plex media server. This setup means you can have all your movies, music, and photos located on the one device, the server. In this case, we will be using a Linux Debian VM on Freebox Delta.
You can then have multiple clients connect to the same server. It is great as you don’t need to have multiple copies of the same media across several devices.
The Plex client is supported on a ton of devices including Windows, Apple (macOS & iOS), Android, Amazon Fire TV, Google TV, Chromecast, Xbox, PlayStation, Linux, and so much more. It really is a fantastic home media solution.
Setting up the Serveri Plex Server
Preparing your Debian/Ubuntu Server for Plex
1) Now before we install the Plex Media Server software, we need first to ensure our operating system is entirely up to date by running the following two commands.
sudo apt-get update
sudo apt-get upgrade
2) To install the Plex packages, we will need to add the official Plex package repository.
Before we do that we need to install the apt-transport-https package. This package allows the apt package manager to retrieve packages over the https protocol that the Plex repository uses.
Install the package by running the command below.
sudo apt-get install apt-transport-https
3) Let’s now add the Plex repositories to the apt package managers key list.
This key is used to ensure the files that you are downloading are in fact from that repository and signed by that key.
Run the following command to download and add the key to the package manager.
sudo curl https://downloads.plex.tv/plex-keys/PlexSign.key | sudo apt-key add -
4) With the Plex GPG key now added, we can finally add the official plex repository to the sources list by running the following command.
sudo echo deb https://downloads.plex.tv/repo/deb public main | sudo tee /etc/apt/sources.list.d/plexmediaserver.list
5) As we have just added a new repository to our sources, we will need to run the update command again to refresh the package list.
sudo apt-get update
If you get the error /usr/lib/apt/methods/https could not be found. Then the https transport package hasn’t been installed. Double check that it has been installed correctly (ie. bullet 1).
Installing Plex to your Server
1) Now that we have set up our Server so that it can read from Plex’s official package repositories we can go ahead and finally install the Plex Media server package to the Pi.
To install the plexmediaserver package, run the command below.
sudo apt install plexmediaserver
2) Now time to Enable Plex Media service to start with boot.
sudo systemctl enable plexmediaserver
sudo systemctl start plexmediaserver
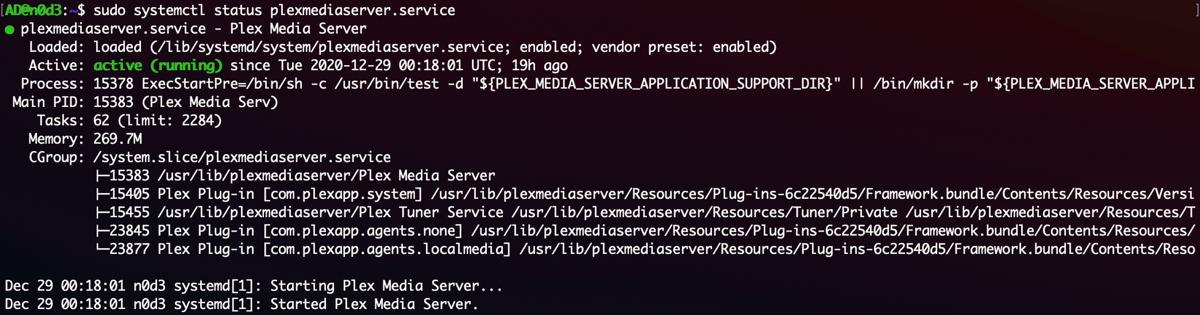
Check the status by the following command,
sudo systemctl status plexmediaserver.service
And you can stop the plexmediaserver.service by the following command,
sudo systemctl stop plexmediaserver.service
3) The installation process for Plex sets up a few different things for us.
The first is that it creates a user and group for Plex to run under. This user and group is called plex.
It also will set up two directories, one where to store files temporarily that Plex is transcoding. You can find this folder at /var/lib/plexmediaserver/tmp_transcoding.
The second directory is where Plex will store all the metadata it retrieves for your media. This folder can be found at /var/lib/plexmediaserver/Library/Application Support.
4) As Plex is running with plex user a different user to root , you will need to make sure you have permissions set correctly on your drive.
Setting a Static IP Address for your Plex Server
Now that we have installed Plex we should make sure that we are using a static IP address.
There are two reasons to use a static IP. One is that the IP will be easier to remember. Second is that it will make sure your Plex server can always be found at the same address.
SSH Tunnel
Plex requires you to access your server from the local network for initial setup. We can get around this with an SSH tunnel. If your local machine is a Mac or Linux-based, create the tunnel by running this command from your local machine’s terminal.
ssh -p <ssh_port> <user_name>@<server-ip-address> -L 8888:localhost:32400
<ssh_port>is your SSH port number to your server,<user_name>is your user name which you use to ssh connect to your server<server-ip-address>is your server IP address.32400is default plex media server port number8888is your redirected port number
Now you can access Plex web interface via the following URL.
http://localhost:8888/web
This HTTP request will be redirected to http://localhost:32400/web on the remote server through SSH tunnel. This SSH tunnel is only needed for the initial setup. After the initial setup, you can access Plex web interface via http://<server-ip-address>:32400/web.
Storing Media
Now there are several ways to store your media. I will mention each of the methods below.
You can hook up an external hard drive with all your music, movies and whatever else you may have.
You’re also able to mount drives permanently
Another option is to set your Server up as a
NAS. This will allow you to transfer your media across to it without needing to disconnect and reconnect a hard drive.
Connecting Clients to The Plex Media Server
If you’re using an app on your phone, computer, or any other device, then the Plex client should be able to pick up on the server automatically.
You will, unfortunately, find the official mobile Plex applications are behind a paywall. For example, you will need to pay money to get full access to all the features. However, all other apps, including the web app, should be free with only a small set of features requiring a subscription.
To connect to the browser, enter the IP followed by the port 32400 and /web/. For example, mine is.
http://<Plex Media Server IP>:32400/web/
You will be prompted to log in, simply sign up or sign in to an existing plex account. You can skip this by just entering by entering the address above again.
Next, you will need to set up your music, movie, and TV show libraries. This process is incredibly easy and shouldn’t be too hard in getting it set up correctly.
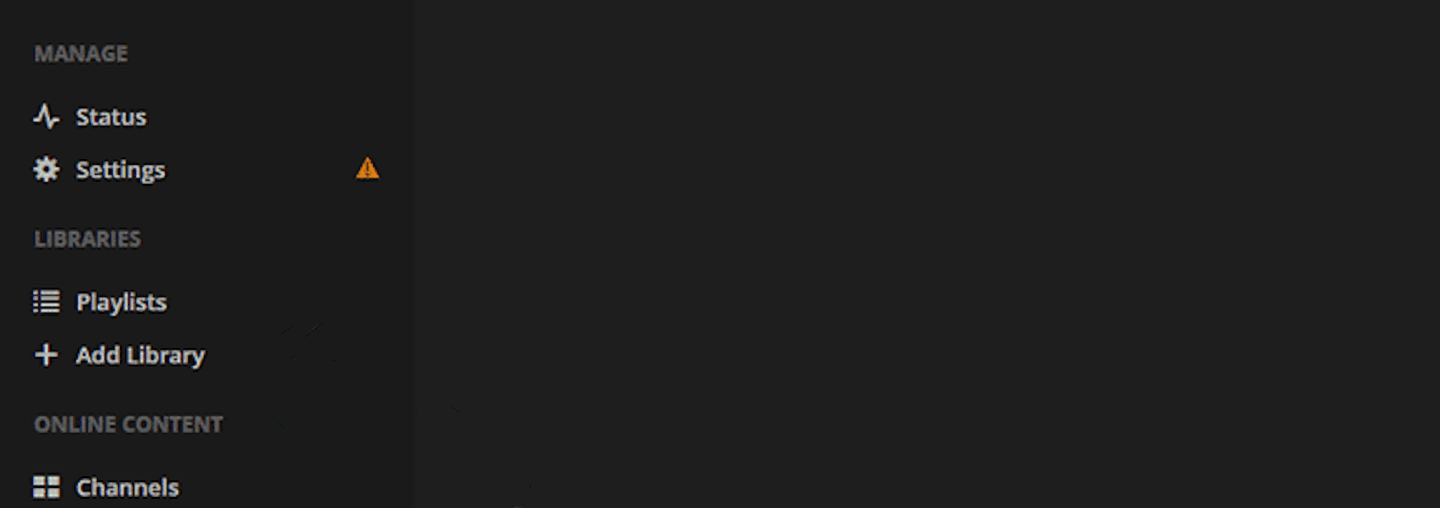
1) First select add library in the left-hand side column.
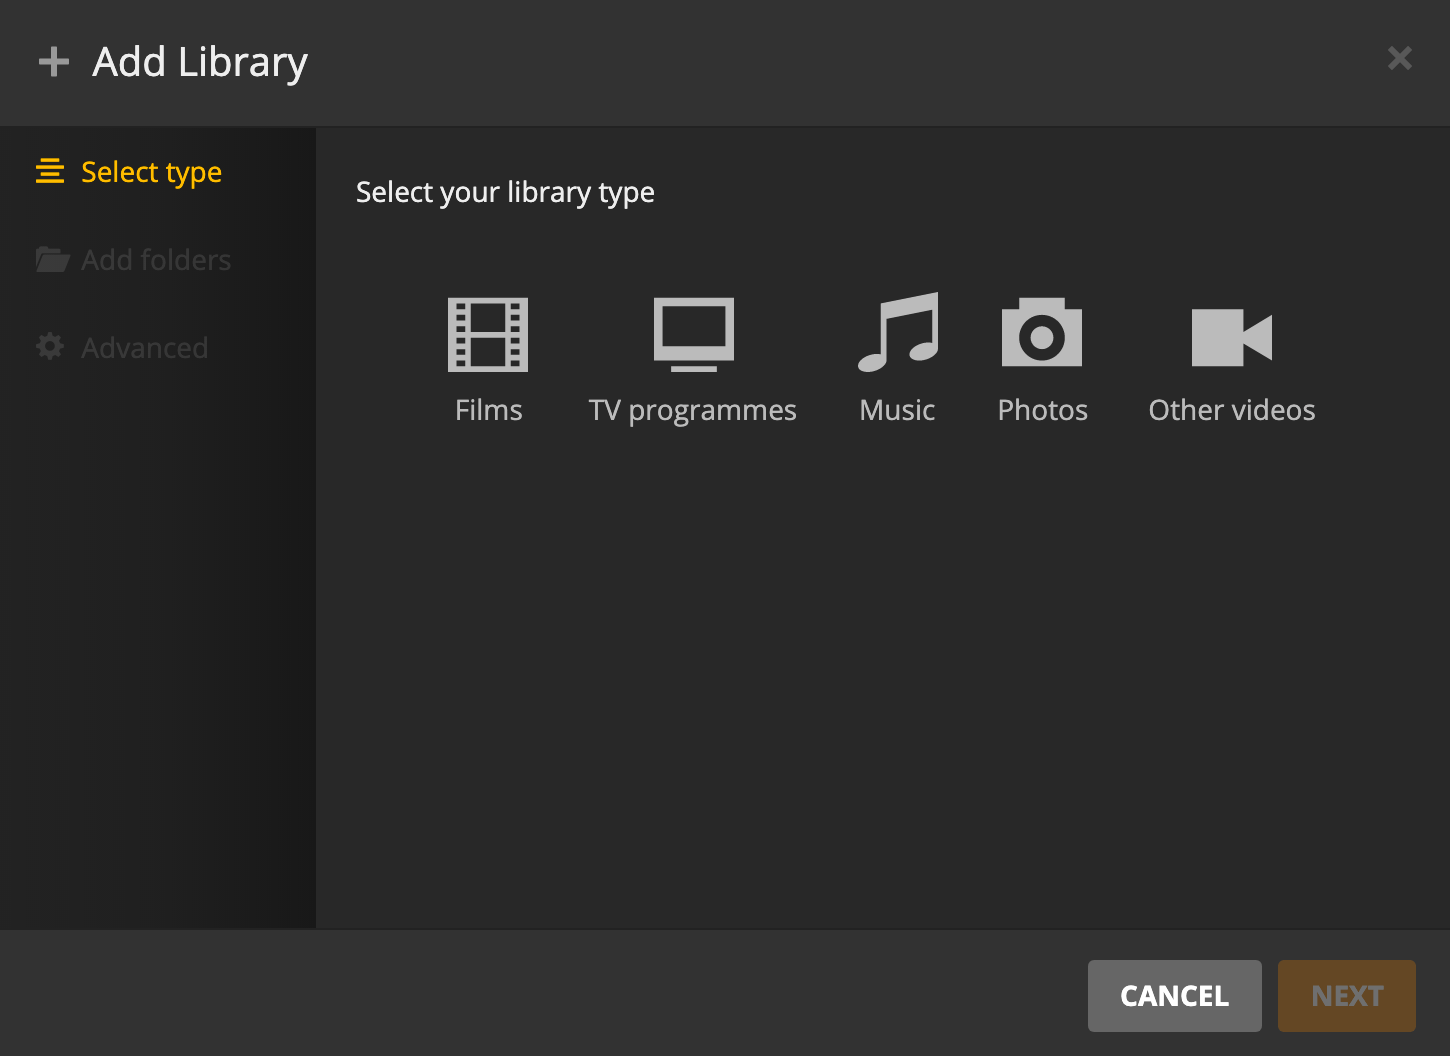
2) Next, select the type of media that is in the folder. If you have more than one type, then you will need to add a new library for each type of media.
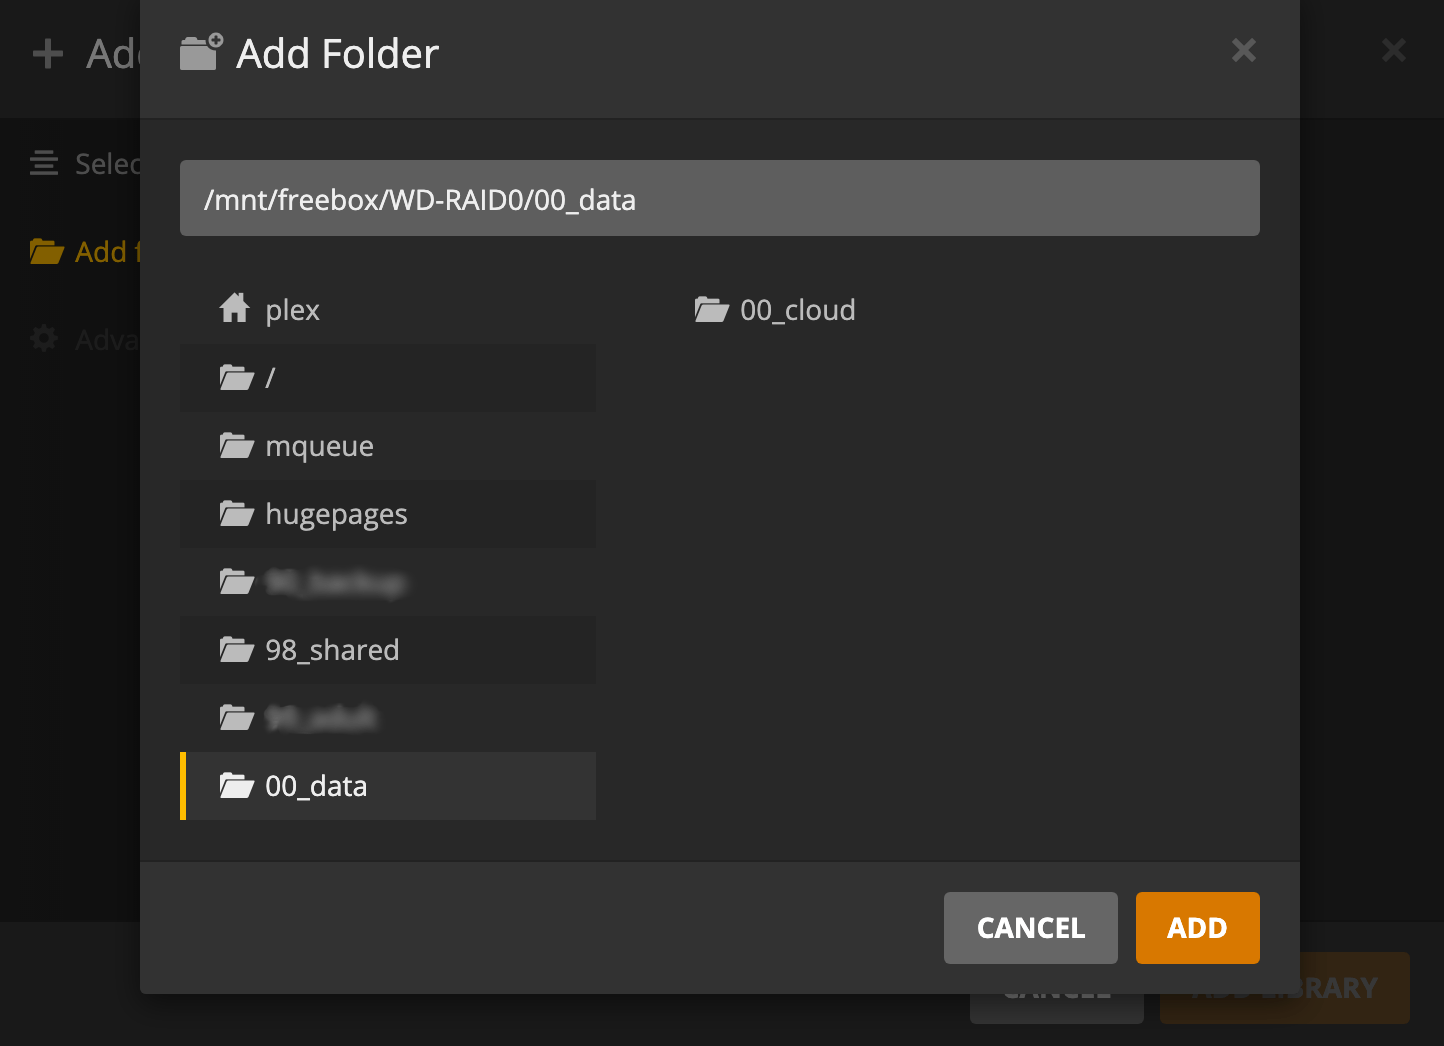
3) Next, you will need to select the folder that has all your media in it.
For example, mine is on a 00_data that is displayed in the left-hand side column or can be found at /mnt/freebox/WD_RAID0
4) Once you add the library, it will now organize your clips in a nice easy to browse interface.
If you need more information on how to setup, name and organize your media library, then Plex has an amazing amount of documentation on naming and organization.
Fixing File Permission Errors with Plex
One of the most common problems you may run into with Plex on your Server is with it being unable to access your files. The most common cause of this issue is incorrect permissions.
This section will show you how to modify the permissions for an ext4 drive.
If you are running an NTFS or FAT formatted drive, you will need to try remounting your disk drive and adjusting its mounting options. The reason for this is that the NTFS and FAT filesystems do not support the Linux permission system.
1) To begin, work out the location of the drive or folder that you want to adjust the permissions for.
For example we have an ext4 drive mounted to our Server at the location /mnt/mounteddisk/.
2) As the next two commands need to be executed as the superuser (root), let’s change to it by running the following command.
sudo su
With the path to your drive or folder in hand, we are going to make use of the following two commands.
Make sure that when you run these that you replace [YOURDRIVEPATH], with the path you want to adjust permissions on.
find [YOURDRIVEPATH] -type d -exec chmod 755 {} \;
find [YOURDRIVEPATH] -type f -exec chmod 644 {} \;
The second command finds all directories and assigns the owner read, write and execute privileges and gives all other uses read and execute privileges.
The third command is used to find all files and will assign the owner read and write privileges, and all other users will get the read permission.
3) Once those commands have finished running, we can go ahead and exit out of the superuser mode.
exit
4) You should now be able to interact with your media files from within Plex successfully.
Hopefully, at this stage, you will now have Plex up and running on your Server without any issues.
If you come across any issues or have some feedback, then please don’t hesitate to leave a comment below.
Updating Plex Media Server
When a new version is released, to update Plex, run the following commands in your terminal:
sudo apt update
sudo apt install --only-upgrade plexmediaserver
During the installation process, the official Plex repository may be disabled. To enable the repository, open the plexmediaserver.list file and uncomment the line starting with “deb”:
sudo vi /etc/apt/sources.list.d/plexmediaserver.list
# When enabling this repo please remember to add the PlexPublic.Key into the apt setup.
# wget -q https://downloads.plex.tv/plex-keys/PlexSign.key -O - | sudo apt-key add -
deb https://downloads.plex.tv/repo/deb/ public main